Monday 19 December 2011

Christmas Gift and Party Cooking


Most of our friends and family are receiving homemade gifts this year. Partly because it's affordable and thoughtful but also because it's fun to make!

One thing I often find tricky about baked Christmas gifts is that I usually see people over 3 or 4 weeks for small friends and family gatherings. This usually means that I either have to make gifts that last well or make lots and lots of fresh batches of things.  This year I made many different items, so everyone received different things.  Another way I got around this problem was to freeze the raw Oatmeal, Chocolate & Cranberry Cookies.  Details about this process are below.

Here is what I've been making.

Tomato & Roasted Red Pepper Relish
This one is an old recipe of my mum's that I've spruced up with the addition of the peppers. It's very old school with the use of Keens mustard powder and curry powder.  I think next time I'll try something a bit different as we've been making this for years. Some mustard seeds would provide a nice pop!


Not Quite Nigella's evilly delicious Snickers Rocky Road. 
The gorgeous and clever Lorraine's recipe can be found here.  I have made about 7 different rocky road recipes in my time, and this is by far the most amazingly yummy one! You really can't beat chocolate, caramel and peanuts and the marshmallows Lorraine uses are the Coles brand chocolate and vanilla marshmallows and they are dense rather than fluffy and work really well!


Malteser Rocky Road
A tooth-aching sweet nut free rocky road.  This was inspired by the lovely Planning Queen.  Here is her recipe. Again I use the chocolate and vanilla marshmallows mentioned above and I use maltesers for the nut replacing crunch.  The main reason I HAD to make rocky road (although I could have made brownies if I'd had time on the day) was to use these adorably kitch reindeer and Christmas tree plastic decorations a la the domestic goddess herself Nigella Lawson.


Maple Toasted Muesli 
This is one of the dishes I made for my little boy's breakfast birthday party.  Recipe found here.


Old fashioned Lemon Cordial
Adapted from the great Stephanie Alexander's recipe from the cook's companion.  We like to add thicker strips of lemon rind and increase the water and lemon content and reduce the sugar a bit.  I adore these little bottles I found at Provincial Home Living.  They were only $2.95 each and make lovely little gifts.  The large bottles are recycled.


Oat, Chocolate Chip and Cranberry Cookies
Adapted from a Martha Stewart (bow to the master!) recipe found here.  These ones were mostly for the kids.  As mentioned above, I made a HUGE double batch of these and froze them, ready to be baked when we were seeing people.  After I made the raw dough, I portioned it up and flattened each cookie out and lay them on baking paper in Tupperware containers and wrapped the containers in glad wrap to ensure no air got to them.  This way, if I was catching up with 2 people, I could simply take 2 cookies out of the freezer and bake them on the day.  This also meant I wasn't eating loads of leftovers along the way!!!


Salted Dulce De Leche Ice Cream
I have posted about this delicious ice cream previously.  Recipe found here.

I dropped some of this (and some of the below raspberry frozen yoghurt) off to the lovely Nicole from Planning with Kids last week.  What an inspiring woman she is!!!!  She has so much energy and vibrance that it is absolutely contagious!!! If you haven't read her book or her blog, she has a very relaxed and balanced and fun attitude to oganisation.  In my opinion, she comes to planning from a view of it improving your enjoyment of life and your family, rather than the organising and busy-ness BEING your life.  She has helped me tremendously over the past year, even though I only met her in person for the first time last week!

She kindly posted a link to my blog this morning also, which has me extremely chuffed! You can see the ice creams I gave her here.

Raspberry Frozen Yoghurt
I can't remember where I found the recipe, but I get a 1kg tub of natural Greek yoghurt, stir in 1/2 cup of golden castor sugar and stir through some defrosted, squashed frozen raspberries and then churn in my ice cream maker.  My boys love this!

Orange and Cranberry Mini Loaf Cakes
I love this cake!!! But my husband isn't a fan of the whole (frozen) cranberries that hide within it.  I think they are deliciously tart and make the cake. Anyway, if he doesn't love it, there's no point in making it, otherwise I'll end up eating it all!  So when I saw these gorgeous mini loaf pans online at the beautiful Emerald & Ella back in August, I had to buy them with these Christmas cakes in mind!


Here are a few packaged up gifts.  The 2 boxes were just old cardboard packaging boxes that I cut the lids off and covered with paper from Spotlight. I made the gift tags using Publisher and as I'm completly obsessed with Chevron pattern (zigzag basically), I had to use that as the backing.  I am not very proficient using publisher, so added the chevron pattern one zig at a time until I had a line of it and then copied and pasted it throughout. I'm sure there is a clever, technical way of doing this, but I made do!
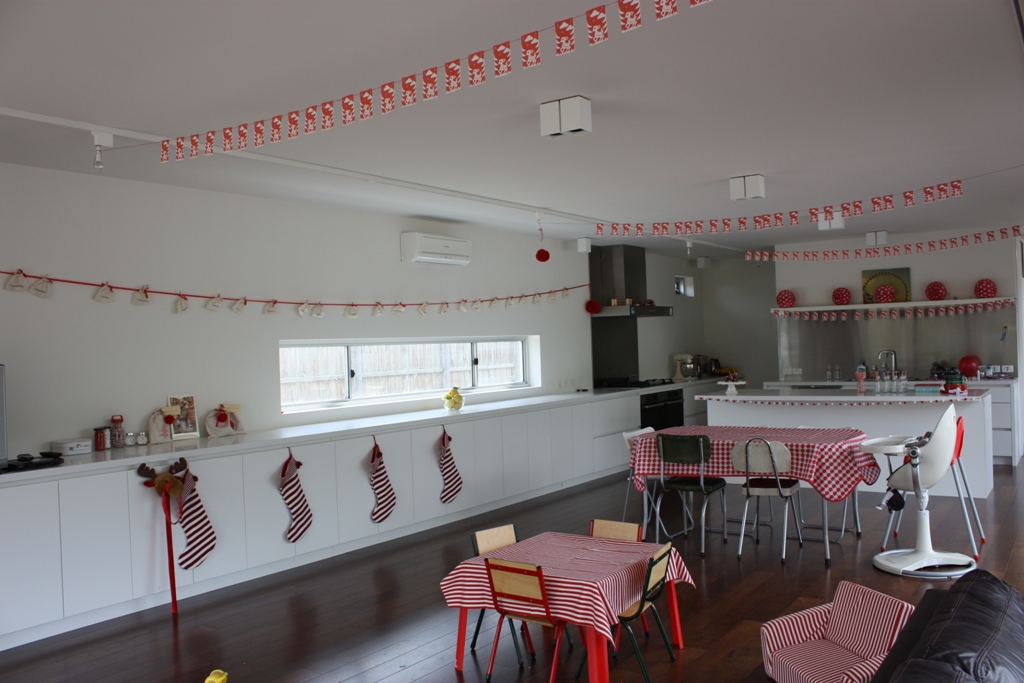


Party Cooking:
One of my good friend Claire's gorgeous girl turned 3 last week and I helped out with the catering for the small, but brilliantly fun party. My Mr 3 had an absolute ball and it was one of those great, relaxed days for kids and mums.

I made little lunchboxes using plain white snack boxes.  My friend Claire is the paper craft queen and she made beautiful babushka doll stickers to go on the top of the boxes with each child's name on them.  As this was her design and I haven't mentioned my blog to her, I won't share the image of this, but they are simple but very effective.

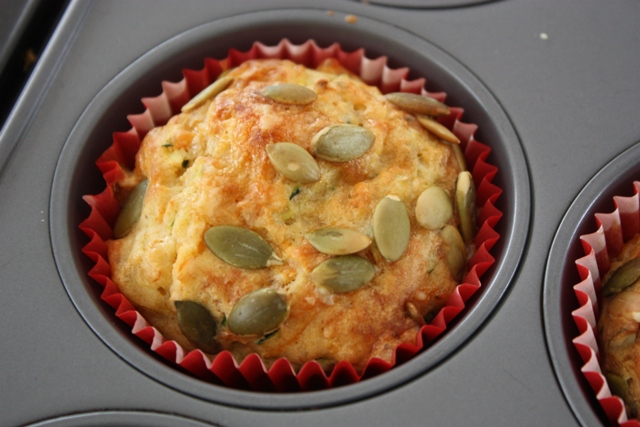
To fill the boxes, I made a version of the gorgeous Ruth's pumpkin frittata - recipe found here.  I replaced the cream with some self raising flour to make the texture more like zucchini slice and less eggy. This was purely done for a couple of fussy egg fearing children who gobbled it up happily with a more solid texture!  I made half the side of the pan with fetta and sage and seasoning, and the other half plain for the littlies. I LOVE Ruth's cooking so much that I am jealous of her kids!

I also made star zucchini pancakes, tomato and basil focaccia, fairy bread and fruit skewers.  Although a lot of the food looks very beige, there were lots of veggies in there!!!


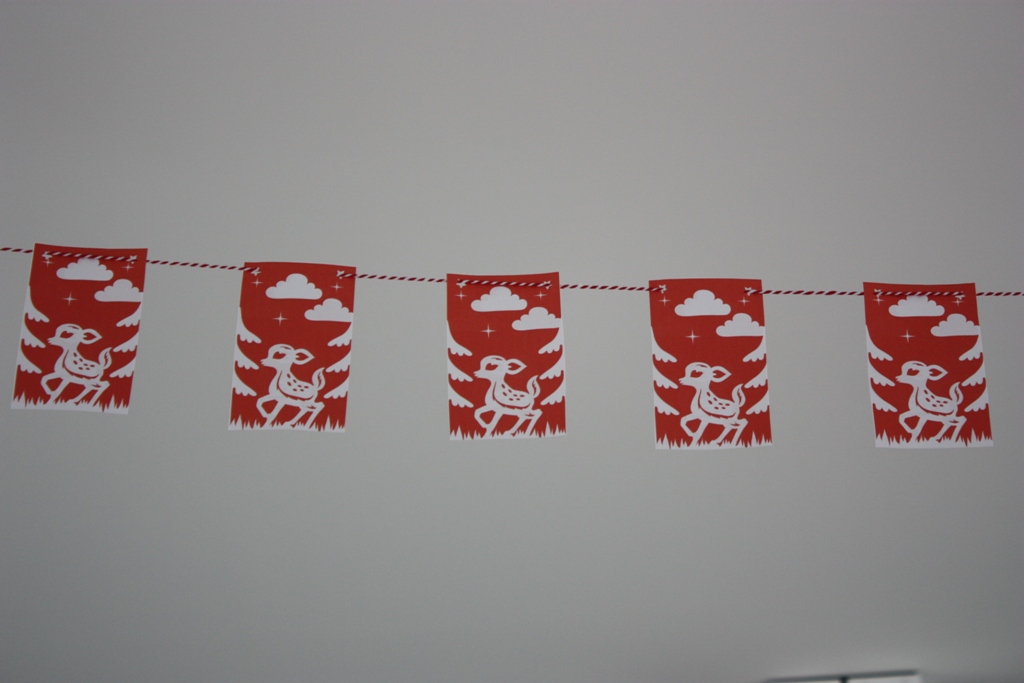
We've also had lots of Christmas parties and picnics where I've been making similar foods and lugging them around town in my cute tins.

Mini versions of the Cranberry & Oat biscuits


It's been a full on few weeks with some crazy things going on around here, so the cuddles from my beautiful babies and all of this crafting and cooking have been what has kept me (semi) sane.  I find it all extremely therapeutic and possibly the level of cooking and crafting correlates directly to the amount of stress at the moment!!! It's lovely to have an outlet! 

I hope everyone is having a smooth and fun lead up to the silly season.  

Love Amy xoxo

Friday 16 December 2011

Christmas decorations and bits and pieces I've been making

I am quite obsessed with Christmas decorations and gifts and I've been making a few bits and pieces. All are based on some clever designs that other people have made!!!

Reindeer Bunting.  Artwork from Gifted Magazine 2010, by Jutta Rikola.  I printed mini versions of these back to front and punched little star holes in the corner and strung them up with red and white butchers twine to make bunting.  I made these last year and am glad to be reusing them!  (Some of these photos are from last Christmas. I am still in a bit of a baking and crafty disaster zone so my house is not this tidy at the moment!!!!)


Red felt pom poms. Image found on Pinterest, tutorial found here.  I envisaged making a lot more of these for decorations in my house, and may keep adding to them later this week, but for now, I've only got 4!  I've also made mini ones to add to gifts. They are so cute!!!!  I really love these - simple but affective!


Merry Christmas stitched packing tags.  I can't remember where I first saw these, but I've seen them a few times and had to give them a try.  I bought the packing tags already cut & perforated from Officeworks, printed them using a font called Rough Typewriter and then did long sticthes on my sewing machine with red thread.  Tied on to gifts with more red and white butchers twine!!!


Calico Advent Calender. Image found on Pinterest here. I think you can buy them on Etsy, but I couldn't find the link anymore when I went to write this post.  I have wanted to make this since I first saw this image and was very excited to make it happen!  Even better was that I managed to use all scrap calico material that I already had and a hotch potch of left over ribbon mostly too!  It took me a while to work out the best (aka easiest!) way for me to get the date on the bags and after some serious think tanking (with my good friend the crafty Claire and also with the lovely and very artistic Kate), I again went with cheap and cheerful.  I bought a $4 stencil from Officeworks and after trying a couple of different markers, I ended up using a biro!  I found the ink bled less with a biro.  Anyway, it was an easy project, although it would have been even easier if my 30 year old overlocker and sewing machine hadn't both packed it in half way through, but I got there in the end.  I really need to take a better photo of the whole calendar hanging on the wall. I will update this soon!


Inside the bags I put little activity cards.  This was initially inspired by this pin and further work shopped with the lovely Cat and Kate.  They are two very creative and inspiring mamas!  I have to admit that I've been quite slack with following all of the activities inside the bags - some days I've been too busy, distracted and forgetful and have pretended the card said sing Christmas carols a few extra times!!! ; )


Calico gift bags.  Again, using leftover material I have made some little gift bags for some of the little people in our lives.  I was going to cut out the initial of the child's name for the front, but in the end, took (another!) shortcut and made shapes instead.  I bought iron on material from a roll at Lincraft and cut shapes out from Word and traced it on the the material. Iron and done!  Being on a bit more of a budget this year, I thought these little bags might help spruce up some low key kids gifts. I've made about 20 already, but will most likely make some more before the festive season is over!!!


Pom pom ball garland.  I have been wanting to buy these gorgeous garlands by Little Lamb Freckle that I've seen at the beautiful Lark store. However, this year's budget did not allow. So while I save up, I have made a cheap, cheat version using cheap fluffy pom poms from Lincraft and some red and white butchers twine from Kikki K.  Definitely no where near as sturdy or pretty as the original, but it will get me by for this year!  I used a thick embroidery needle (from Nana's sewing stash!) and made sure I threaded it right through the centre of the pom pom so they didn't come apart.


And last of all, the obligatory kids dressed up homemade Christmas card.  I always include at least one feral photo of my kids in this - a screaming baby etc. This year, it must be this Christmas Elves Gone Wild photo. I am quite proud of Mr 1 for tackling Mr 3 and getting some of his own back!!!  And the message on his cute butt says it all!!!


I will update this post when I've finished decorating and add to this any further crafty bits.


UPDATED:
I finally tidied my house in time for our first little Christmas party and put up the last of our decorations, so here are a couple of pictures from this year. I've now strung the garland along our island bench, added a square piece of fabric to the kids table as a make shift table cloth (not even hemmed, just cut at the last minute as it was hanging around and cute!), you can see the advent calender in full view and you can see a couple of gift bags ready for some little visitors.  I've also got a gorgeous vintage christmas print (sitting next to the little lolly jars and the calico bags) which I found at Magnolia Square Market and bought from a very lovely lady. Her small business is called Vintage Print and you can find her website here.  I will eventually frame it!  (I also bought a few other prints from her for my boys from Santa!)  There is another print above our kitchen sink that was a gift from a lovely lady from the gorgeous Incy Interiors.  We bought Mr 3's bed from there and when there was a little delay, she kindly sent him the Ferris wheel print as a gift.  I love it too much to put in his room so it's still in the kitchen months later!!  Also next to the lolly jars is a cute little white suitcase that came with my maple syrup jar from the gorgeous Emerald and Ella. It is currently storing my twine and sewing scissors.  And of course, I had to dig out the little soda bottles again! This time with some red and white stripey straws. Along with some old biscuit tins of my mum's and my favourite tin from the gorgeous Lark.  The tins have been thoroughly used already this Christmas hauling biscuits, focaccia  and fruit skewers to picnics, numerous parties and Christmas carols in the park.

A few oddities to note. The couch is now pressed up, facing the window because Mr 1 has become a dare devil jumping head first off it! And this year, our Christmas tree is staying outside due to some little red back visitors in our backyard!!!!


Still to come my post on the homemade tasty treats for Christmas gifts.

I really, really, REALLY love Christmas!!!!  Time to put on the Christmas Carols CD.  Or even better, dig out my old 1970 record for some old school, scratchy sounds!

Love Amy xoxo

Tuesday 13 December 2011

Vegetable, cheese & pepita muffins


I know it’s a funny time of year to be posting about a lunchbox item! However, I have been making these all year and have had so many requests for the recipe, I thought I’d post it here while I was emailing my friends.  Also, as the year is winding up, I am thinking towards next year, when my eldest will be off to preschool 2 days a week and needing a lunchbox.  When he was about 18 months, he went off eating vegetables. Prior to that, he ate wholemeal sandwiches at lunchtime and veggies and meat and pasta for dinner.  In a bid to get him back to eating veggies, and to take the pressure off dinner time, I started making vegetable pancakes and vegetable muffins for lunch.  It got lots of veggies in to him, however, now he won’t eat sandwiches!
So, my freezer is constantly full of zucchini pikelets and these vegetable muffins.  Next year, I will grab a couple of these out of the freezer in the morning and put them in my son’s lunch box...until he finally starts eating vegemite sandwiches like his friends!!!

This recipe comes from the CSIRO Wellbeing Plan for Kids Book which I really love.  I have changed the recipe a bit.  It calls for margarine, but I am fundamentally against margarine so I have substituted for vegetable oil.  The recipe also calls for low fat milk and cheese.  I use whichever of those items I have at home, often reduced fat, but that’s not my primary focus for my boys’ meals.  Obviously I don’t want them eating high fat, but I’m more interested in unprocessed food (most of the time!).

I have made these a few times in mini muffin tins for kids birthday parties and they go down a treat too! 

Vegetable, cheese & pepita muffins
Makes 24
Ingredients:
  • 1 cup wholemeal plain flour
  • 1 cup plain white flour
  • 4 teaspoons of baking powder
  • 1.5 cups milk
  • 2-4 eggs (Depends on the consistency you prefer. Both options are nice! Sometimes I like more eggs to increase protein for the boys.)
  • 2 zucchinis
  • 2 carrots
  • 125 mls of vegetable oil
  • ½ cup grated cheese
  • ½ teaspoon dried mixed herbs
  • Extra grated cheese & pepitas (pumpkin seeds) for sprinkling

Directions:
  • Preheat oven to 190 degrees Celsius
  • Line 2 12 hole muffin tins with paper patty pans (or spray muffin tins with oil spray)
  • Grate cheese and set aside


  • Grate carrots and zucchinis & place on paper towel and squeeze liquid out of veggies


  • Put the flour, baking powder and herbs in a large mixing bowl (sift if you want to!)

  • Place milk, oil and eggs in a jug and whisk lightly.

  • Pour liquid in to flour and mix with a wooden spoon. Add veggies and cheese and mix through.

  • Spoon mixture in to pan, filling papers about two thirds – leaving room for them to rise.
  • Sprinkle with grated cheese and pepitas. (I don't put pepitas on my 1 year old's muffins, just in case they are a bit of a chocking hazard!)

  • Bake for about 20 minutes or until the muffins spring back when pressed.


  • Cool on a wire rack before serving.
  • If you want to freeze them, allow to cool completely and then store in airtight container or in zip lock bags.


Notes:
  • These can be tricky to peel out of the papers, especially when hot. Once they’ve been refrigerated or frozen, they are much easier to peel.
UPDATED:
I have updated the above recipe to increase the amount of oil and with the option of reducing the number of eggs and not using paper muffin cases depending on your preference. I think they were a bit crispier without the cases, but they did stick to the tin. Without cases is easier for kinder lunchboxes but the cases are cute if using them for a party! Basically, this is a very forgiving recipe so feel free to switch things around!!!xoxo

 I hope if you try this recipe, your kids love these as much as my boys do!

Love Amy xoxo